This video, which was created for STEAMfest by Krishna Myneni, is an introduction to astrophotography. Astrophotography, also known as astronomical imaging, is photography of astronomical objects, celestial events, and areas of the night sky. The first photograph of an astronomical object (the Moon) was taken in 1840, but it was not until the late 19th century that advances in technology allowed for detailed stellar photography.[1] In this video, Mr. Myneni demonstrates in detail how to setup and photograph “star trails” using a common DSLR camera.
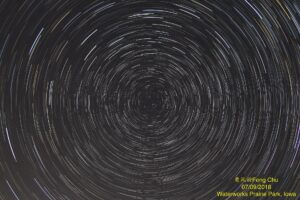
A “star trail” is a type of photograph that uses long exposure times to capture the apparent motion of stars in the night sky due to Earth’s rotation. A star-trail photograph shows individual stars as streaks across the image, with longer exposures yielding longer arcs.[2] Typical shutter speeds for a star trail range from 15 minutes to several hours. However, a faster technique is to blend a number of frames together to create the final star trail image.
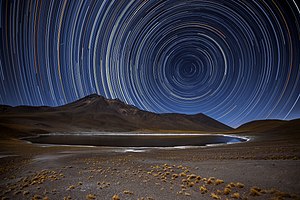
Star trail photographs are possible because of the rotation of Earth about its axis. The apparent motion of the stars is recorded as mostly curved streaks on the film or detector. For observers in the Northern Hemisphere, aiming the camera northward creates an image with concentric circular arcs centered on the north celestial pole (very near Polaris). For those in the Southern Hemisphere, this same effect is achieved by aiming the camera southward. In this case, the arc streaks are centered on the south celestial pole (near Sigma Octantis).
Mr. Myneni details the procedure for making a “star trail” photograph by combining a series of images including:
- How to find the North Star.
- How to setup and level a tripod.
- How to configure a DSLR camera in “manual” mode for photographing star trails including recommended ISO, aperture, and exposure time.
- How to point the camera to the North Star using tripod adjustments and manually focus on the stars.
- How to take a picture and use the free nova.astrometry.net website to identify the stars in a picture.
- How to take a series of pictures over a period of about 20 minutes.
- How to use the free GIMP graphics software to overlay the images and create a single image that shows the changing position of the stars – the “star trails”.
By measuring the angle traversed by a star relative to the North Star, it’s possible to calculate the Earth’s period of rotation. Mr. Myneni shows:
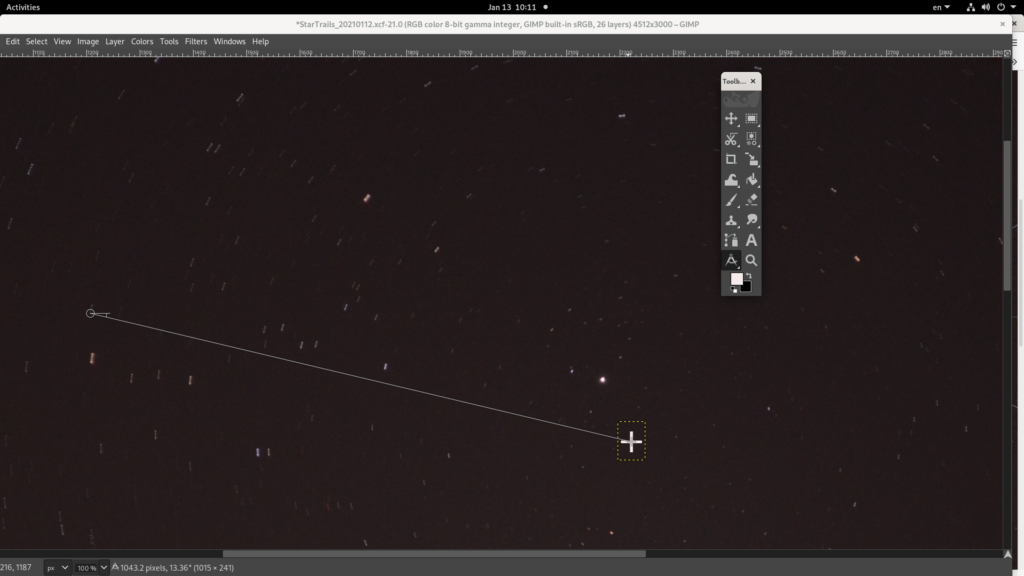
- How to use the measurement tool in GIMP to measure the angular size of the observed star trails.
- How to compute the Earth’s period of rotation from the measured data.
- How to compare the measured period to the accepted value and determine the percent error in measurement.
Annotating Star Images
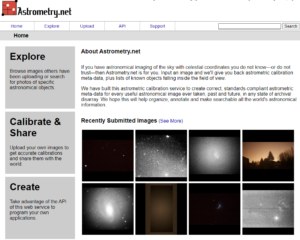 nova.astrometry.net is a free website sponsored by the National Science Foundation, NASA and the Canadian National Science & Engineering Research Council that provides astrometric calibration and annotation. You can create a free account and upload your own pictures of the stars. The images will then be automatically processed to identify the region of the sky and annotate stars and other objects. The image is also corrected for scale distortion.
As an example, here is the starting image of a sequence, taken by Mr. Myneni and annotated by nova.astrometry.net.
https://nova.astrometry.net/annotated_full/4857245
Example Calculation
Prior to making the video, Mr. Myneni did a trial run of observations. Here we’ll use the data to demonstrate the calculations to determine the Earth’s period of rotation. Starting with an overlay of 5 images, captured over a duration of 203 s (based on the image time stamps). The positions of the stars in each of the 5 images creates a dotted line which is the path of each star about the Celestial North Pole, marked by the “+”. Note that the CNP is displaced from Polaris, the North Star, which is the bright star near the CNP.
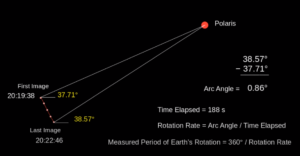
The Gimp measurement tool can be used to find the angles at each end of the star trail and to measure the angle through which the Earth has rotated in the given time. The analysis of rotation rate is as follows:
1) For the indicated star trail, the angle at one end of the trail is 14.20 degrees (with respect to horizontal) and the angle at the other end is 13.36 degrees. Subtracting these two numbers gives the angle through which the Earth has rotated about its North Pole:
Star Trail Angle = 14.20 – 13.36 = 0.84 degrees
2) Dividing the above number by the elapsed time (203 s) gives a rotation rate of 0.004138 degrees per second.
3) For a full 360 degree rotation, at the rotation rate determined above, the time required is
360 degrees / 0.004138 degrees/s = 86,998 s
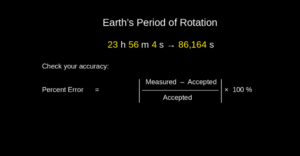
4) Calculating percent error against the accepted value of 86,164 s:
(86,998 s – 86,164 s) / 86,164 s = 0.00968
Wow … accurate to less than 1%!
More Star Trails
For more images of star trails check out:
About Krishna Myneni
I am a physicist in real life, currently working in the specialized area of laser-atom interactions, with some engineering background in sensors and software. In my spare time, I am sometimes an amateur astronomer who uses a small telescope to photograph celestial objects (planets, moon, Sun during solar eclipse, lunar eclipse, star clusters, nebulae, galaxies, and interesting star fields).
I use the same telescope, a 6-inch Newtonian reflector, which I purchased in high school about 40 years ago for about $200. The 6″ refers to the diameter of the primary mirror which is parabolic in shape and focuses the image of celestial objects at about 4 ft away. It also has a “equatorial mount” and a “clock drive”, which allows the telescope to rotate about the polar axis to follow the motion of the stars and planets due to rotation of the earth. The capability of the telescope to rotate precisely about the earth’s axis, at the same rate as the earth (hence the name clock-drive), is essential for making exposures of narrow regions of the sky for more than a couple of seconds, in order to capture faint objects. While the telescope would now be considered obsolete, it is still highly useful for observing astronomical objects and celestial events. One advantage of its reduced complexity is that I can completely take it apart, mechanically, optically, and electrically, and fix anything which needs to be fixed, and put it back together.
I also use a low cost DSLR (digital single lens reflex) camera, a Nikon D3200, for making photographs. When attached to the telescope, via a special adapter to attach it to the telescope’s eyepiece holder, the camera needs no lens — the only optics doing the imaging on the camera sensor is the primary parabolic mirror. It is a very simple system.
Some of my images of the 2017 solar eclipse may be found here:
http://www.physics.louisville.edu/index.php?option=com_content&view=article&id=170&Itemid=272
- Did you enjoy learning about astrophotography and star trails in this activity?
- The video describes aiming the camera towards the celestial north pole (CNP). What do you think the photos would look like if you pointed the camera to the east or west?
- If the Earth was rotating faster, would the star trails be longer or shorter?
Earn badges and qualify for prize drawing by registering and answering journal questions. It's fun and easy!
[1] Wikipedia – https://en.wikipedia.org/wiki/Astrophotography
[2] Wikipedia – https://en.wikipedia.org/wiki/Star_trail

