![]() Lily is a 9th grade student at Woodlawn School and enjoys creating art in her spare time.
Lily is a 9th grade student at Woodlawn School and enjoys creating art in her spare time.
How to Make a Pour Painting

Setup:
Pour painting is relatively messy due to the paint that drips off the side so you’ll want to put drop cloth, plastic, or newspaper down wherever your painting. You’ll also want to wear something you’re not afraid to get paint on. You should wear gloves if you don’t want paint on your hands. It’s helpful to put a brick or something small under the canvas so it’s easy to pick up and put down.
Step 1: Choose your colors!
Be sure you are familiarized with the color wheel to make sure you know which colors will mix well and which ones won’t. Complementary colors sometimes mix to make brown, muddy colors so unless that’s what you are looking for, I recommend not mixing those colors. For your first pour painting, I suggest choosing 3-4 colors. If you choose lighter colors and 1 dark color it will add contrast to your painting.
Step 2: Mix Your Colors
- Pour about 1-2 oz (depending on the size of your canvas) into small cups.
- Mix 1 part paint with 2 parts Flood or water.
*Your paint needs to be very thin so it spreads smoothly and evenly across your canvas.
*Make sure there are no chunks or dried paint mixed in.
Step 3: Add Silicone Oil (optional)
Silicone oil is used to make cells in your painting. The oil separates the layers creating the cells.
- Add 2-4 drops of silicone oil to the colors in which you want cells to appear
* The number of drops you add varies based on how much paint you are using
Step 4: Base Coat (optional)
The purpose of the base coat is to help keep all your colors on the canvas. When you pour, a lot of the paint falls off the side of the canvas. When using a base coat, instead of your colors falling off, the base coat will get pushed off the side first, creating a tighter design and more prominent colors. White or black base coats work the best.
Use as much paint you think it will take to cover your canvas
- Mix 1 part paint with 1 part flood or water
- Gently pour the paint onto the canvas
- Tilt the canvas to move the paint to cover the whole canvas
* tilt the canvas toward the spot you need to be covered then tilt back towards the middle before repeating so that most of the paint stays on the canvas
Step 5: Combine colors
Gently pour each color into a large cup, layering them
Step 6: Pour!
Method 1:
- Hold your cup of paint in one hand and take your canvas in the other
- Place the canvas face down on the cup, with the cup in the center of the canvas
- Hold the canvas tightly on the cup then quickly flip it over
- Set the canvas down while pressing down on the cup to keep most of the paint inside
* steps 3 and 4 need to be done quickly so that the paint stays in the cup
Method 2:
- Hold the cup in one hand and very quickly flip the cup onto the canvas
- press cup to the canvas before too much of the paint escapes
*This method works best with the base coat
*flipping can take practice to keep the paint in the cup so make sure there is something covering your workspace to catch any spillage
Step 7: Make Your Design
- Gradually and slowly lift the cup from the canvas
* if a lot of paint starts coming out from the cup at a time, quickly press the cup back down to the canvas to stem the flow. Lift it up and down until all the paint has come out
- Gently tilt the canvas back and forth to cover the entire canvas in the paint
* tilt the canvas toward the spot you need to be covered then tilt back towards the middle before repeating so that most of the paint stays on the canvas
* there will be paint dripping off the side, that’s normal
- If you can’t get the paint to the edges, you can take your palette knife and lightly smooth some of the paint from the middle over to the edges (only skim the top of the painting)
- Sometimes there are air bubbles in the paint. If there are you can take a toothpick or needle to pop them
Have Fun!
Remember! Each acrylic pour is unique so there’s not really a way to mess it up. You can experiment with colors to see which ones you think have the best outcomes and see what kinds of interesting patterns you can form. You can also experiment pouring with or without the silicone oil to see which way you prefer.
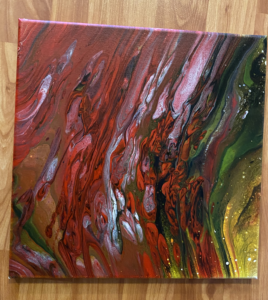
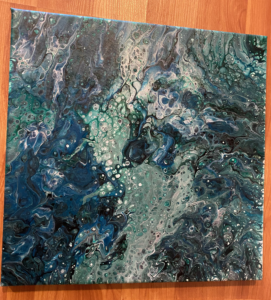
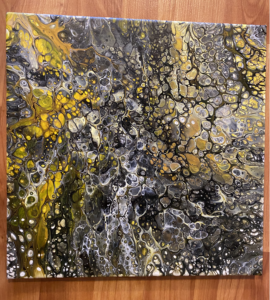
Examples:

 Science of Pour Painting
Why don’t the colors mix when you combine them? Paint is made up of three main components: pigment, binder, and solvent. The pigment is the color and is typically made out of a sort of metal, natural substances, or other matter. The pigment is usually solid. The binder is a glue-like substance that helps the particles of the paint to bind to the canvas. When you mix the pigment and the binder it makes a very thick substance, therefore, you need a solvent. The solvent thins the paint making it so the paint spreads easily across your canvas. In pour painting we use additives, such as floetrol, to thin the paint so it glides across the canvas when you pour.
Each paint color has a different density due to the pigment. When you combine the paint in the cup, the colors with high-density sink to the bottom and the low-density colors float to the top. Since each color has a different density, when you combine them, colors don’t mix as they do when you shake or stir them.
Color Waves and the Electromagnetic Spectrum
Ever notice that when you’re in the dark you can’t make out colors very well? That’s because color is a form of light. Color that can be represented on the electromagnetic spectrum. The electromagnetic spectrum was discovered by Sir Isaac Newton and conveys the types of light waves and the difference between them. Much of the spectrum is made up of invisible light waves although color is one of the few types of light waves that are visible.
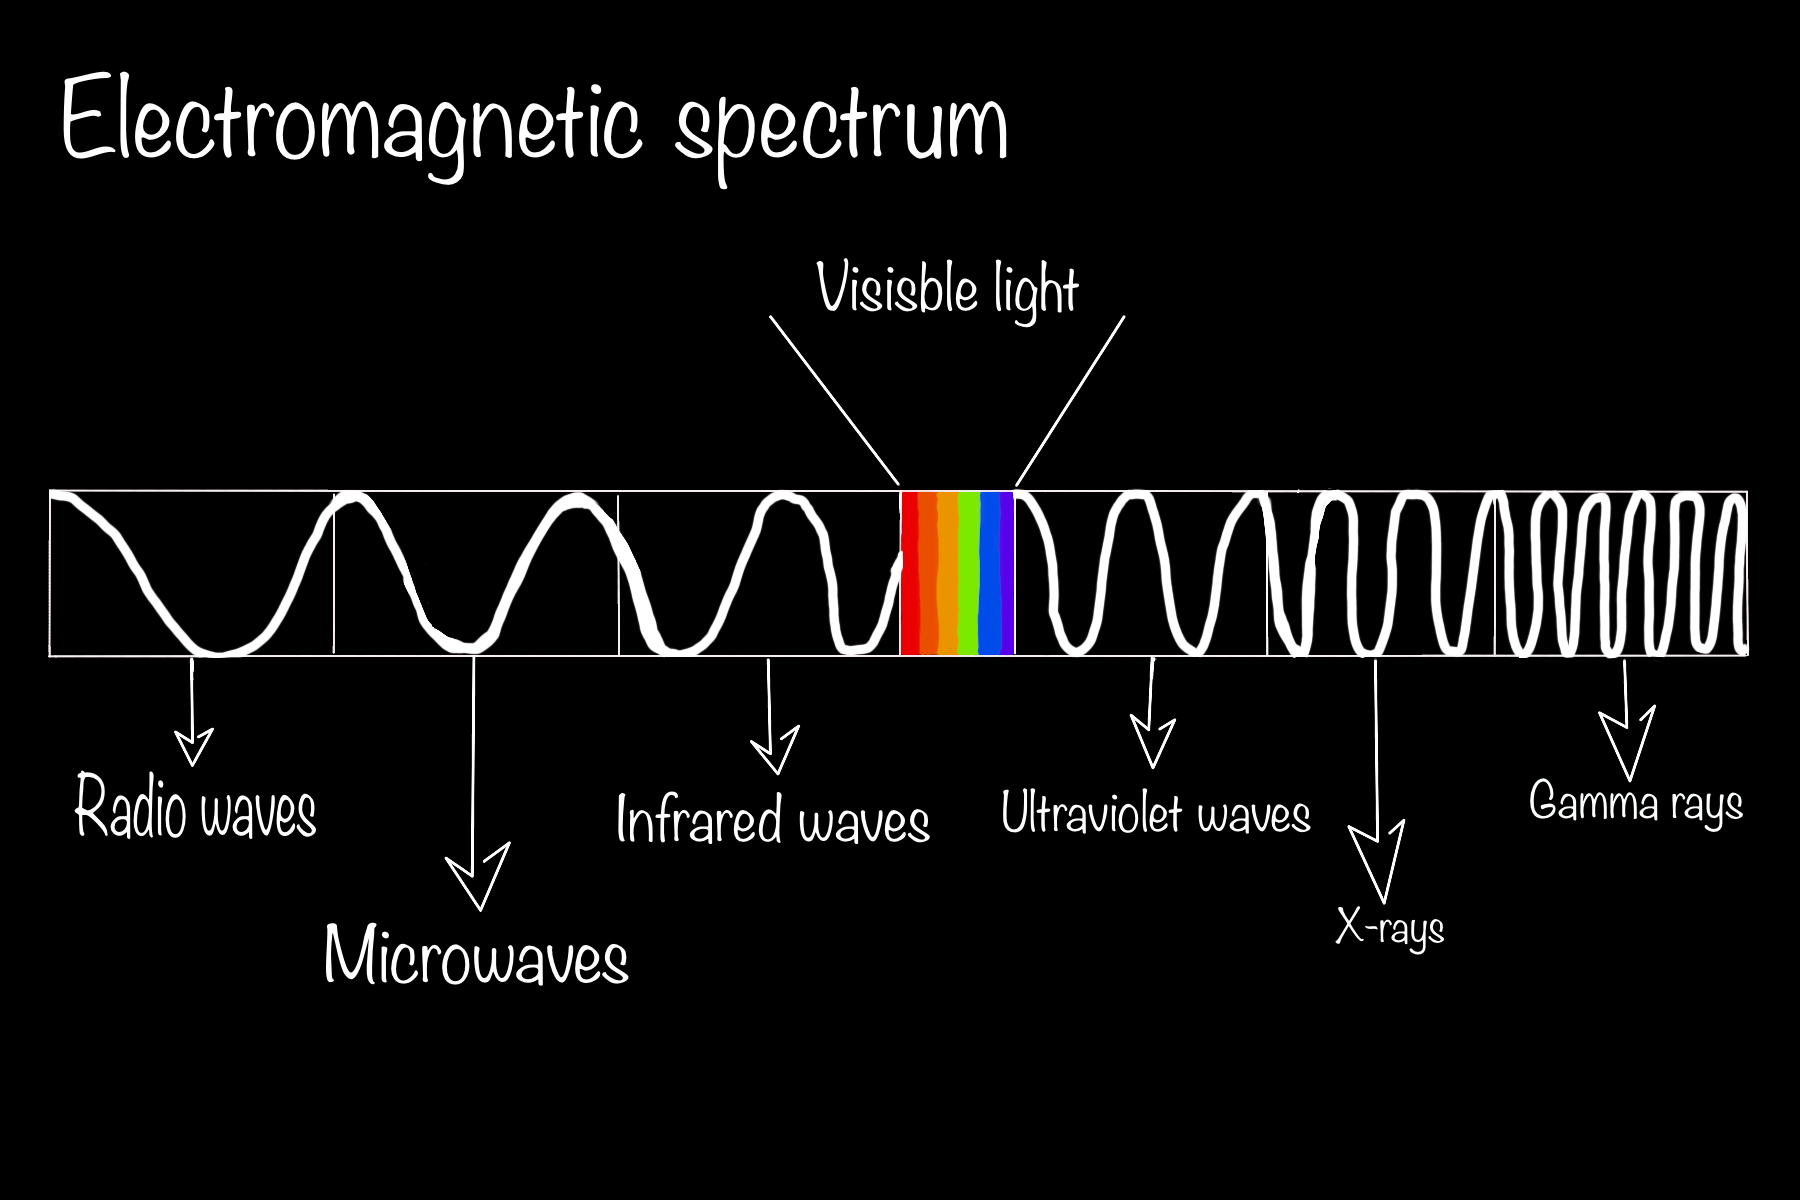
An object emits color because of the way it interacts with light. Every color has a frequency, wavelength, and energy. Frequency is the number of times a wave passes a fixed point in space over time. Wavelength is the distance between two consecutive waves. Wavelength and frequency are inversely proportional, therefore, waves with a longer wavelength have slower frequencies and shorter wavelengths have faster frequencies. Red, for example, has the longest wavelength, but has the slowest frequency and violet has the shortest wavelength and fastest frequency.

